Thursday, March 31, 2011

The first of my LA garment district fabric finds

One of the first things I found in the garment district was that a lot of the stores had some of the fabulous ruffled fabrics I've been eyeing.  Luckily, I knew to shop around, so I ended up getting a pretty good deal on these two. 

Aren't they pretty?  The purple ruffles are the width you would normally see in this fabric, and the gray are narrow ruffles.  Now I need to decide what to make. 

Maybe I'll make a swimsuit like Dana made.  I think that will definitely be on the list!

Or some capri-length ruffly leggings like Katy made.  I think the gray would be cute for these.

And how cute is this hat?! 

Either of my girls would be adorable in one of these tunics.

Decisions, decisions!

Wednesday, March 30, 2011

Where have I been?

Hi, there!  Sorry to leave you all hanging over the past week.  I had a work trip to LA, and I just got back this afternoon.  It was my first time going there, and I knew without a doubt that I wanted to go shopping in the LA Garment District even though I would have to go by myself on Saturday.

It was so much fun!  I'm going to take some pictures of my finds and post them for all of you who love fabric as much as I do, but that will have to wait until later in the week.  I'm tired tonight! 

Wednesday, March 23, 2011

Check it out: another finished shirt!

When the sew-along was in full swing a couple of you commented that you had ordered but had not received your Ottobre magazine yet, so there are still some finished projects coming in.  Go take a look at this super-cute western styled one on an equally cute little girl with fabulous cowboy boots to match!  http://blissfulthings-lanirose.blogspot.com/2011/03/otto-sew-along.html

And Mel posted some more methods for creating a rolled hem on the sewing machine that you should definitely take a look at and try.  http://sewingmel.com/wordpress/index.php/2011/03/rolled-hems-on-a-sewing-machine-part-2/

Monday, March 21, 2011

Have you tried a new technique lately?

Do you typically sew the same things over and over, sticking to your tried and true patterns and techniques?  Or are you just starting out, so almost everything you do is new and exciting territory? 

Either way, I'm passing along Sewingmama's March Challenge to go try a new technique.  I'm really enjoying the challenges as they make me step outside of my comfort zone and do things that might not be on my to do list.    March was hard because I've been sewing a long time, and even if I'm not always successful, I've tried many different things, so I finally settled on freezer paper stencilling. 

If you haven't tried it, you really should.  The results are really quite fabulous!  Basically, you trace your design onto freezer paper and then cut out around it with a craft knife.   Then, you iron the paper onto your fabric and paint inside the stencil.  When your paint dries, peel off your freezer paper, and you have something like this:  (Warning: really poor picture ahead.)


I used metallic silver fabric paint and stencilled onto an adult size small t-shirt.  I'm going to cut the t-shirt into a tank dress or night gown for Allie.  I'm pretty sure she will like it. 

There are tons of tutorials out there for how to do this, so if you think you might like to do something like this, a quick google search will get you started.  To find my image, I googled "free silhouette clip art."


Saturday, March 19, 2011

My Finished Sew-along Dress


Wow!  I'm sorry to keep you all waiting.  I bought my snaps last night and finally put them on today.  These are the colored snaps from Joann's. . . they are plastic with metal insides, and I put them on with my trusty hammer.  I bet most people don't think of a hammer as an integral part of a sewing box, but it definitely is for me!

I also made a D-ring belt for Allie to wear, and I love it! 

This is what I get when I tell her she can pose however she wants.  Ha ha!


I've got my first freezer paper stencil on the table drying, so hopefully, I can show y'all that tomorrow. 

Friday, March 18, 2011

More Shirt Dresses for your Viewing Pleasure

Christephi (not her real name, according to her blog :) ) finished both a shirt and a dress as part of the sew-along.  They turned out so cute, and I'm really digging the dress without the frill. . .it gives it a very classic feel.  I hope you will go take a look for yourself:  http://sproutingflowers.wordpress.com/2011/03/17/vaahtokarkki-blouse-and-dress/

I finally made it to Joann's today and bought my snaps, so I can finish up the dress I made during the sew-along.  I also bought some D-rings and some webbing, so I can make a belt to go with my dress.   

The other thing I have planned for this weekend is some freezer paper stencilling.  The March challenge at sewingmamas is to do a technique you've never done, and I've decided freezer paper stencilling is what I want to do.  I've just got to decide what picture I want to use.  Do you have any suggestions?  If it helps, I'm stencilling on hot pink t-shirts, and I bought silver metallic fabric paint.  Leave me a comment if you have any ideas!

Tuesday, March 15, 2011

A Purse and Wallet for the Silent Auction

This past Saturday was the Spring Festival and silent auction at Allie's school, and they asked for donations for the silent auction.  I decided to make a purse and wallet, but I wasn't sure anyone would bid on it, so I made one that I would love to keep if no one wanted it.  Luckily (or not, depending on how you see it), some people did want it, and it ended up selling, so that's good. 

The purse is the Amy Butler Birdie Sling in some of Amy Butler's fabrics.  Funny story though:  I chose these fabrics to go together based on a seeing them made into a  different purse on the website, but when the fabrics arrived at my house, I just wasn't sure I would like them together.  I laid them out on the table and stared at them all day, and they didn't look okay together to me until the next morning. 


Here's a closer look at the fabrics.  Aren't they gorgeous together?


The wallet is self-drafted.  It is what I call my "Hold it wALLet"--corny, huh? :)  But, it literally holds everything. 

Zippered change pocket and bill pocket.
12 card slots with storage pockets behind them.
And a checkbook cover. 


I'm glad it sold!  I will be making a couple more sets in the coming weeks:  one for me and one for a friend. 


Sunday, March 13, 2011

Check it out!

I'm having so much fun seeing everyone else's finished shirts/dresses.  Please take a minute and go take a look at Cindy's versions (she made 2), not to mention her gorgeous girls!

http://siestasandsewing.blogspot.com/2011/03/oliver-otto-picnic-outfits-named-per-ms.html

I can't wait to see your versions too!

Thursday, March 10, 2011

Sew-along--Finishing Up!

I know that some of you have already finished your shirts/dresses, and I really can't wait to see them.  Today's post will be about the final few steps you will need to take to have a finished shirt or dress.

We finished yesterday with the collar binding.  The first step today is to turn the button band top corners right side out.  When you do this, the unfinished ends of your collar binding will end up neatly inside the button band.  Fold the rest of the button band in half length-wise and press.  I used my hem gauge to make sure I kept a uniform width all the way down.


Top-stitch around around all sides of your button bands, making sure to catch the back side of the band in the line of stitching closes to the shirt fronts. 


Hem your shirt or dress, using your favorite method.  I did a narrow hem that ended up being about 1/4-inch wide.  Then, you will need to do your closures.  I did buttons and buttonholes on Jenna's dress and snaps on the shirt I made Allie.  I think I will do snaps on this dress for Allie too, but I don't have enough tonight, so I'll have to get them tomorrow and give you some modelled pictures this weekend.

Thank you so much for sewing with me!  It was fun.  Show me your shirts and dresses too, please :)

Wednesday, March 9, 2011

Sew-along Part 5: Collar

I'm having so much fun hearing how you are all doing and I can't wait to see your finished products.  Please do make sure to let me know, so I can either link to yours or post pics, so we can all see our finished products!  I don't think we're going to finish up today, but we should get done tomorrow.  Today, we will put on our collars.

First, take your two collar pieces (one interfaced, the other not) and stitch the outer edges together.  Leave the edge that attaches to the shirt open.  Notch the curved "corners" and it doesn't hurt to clip every inch or so into the seam allowance on the straight edge between them.  (It isn't actually straight--it has a slight curve--so the clips will help it lay better when you turn it.)


Turn your collar right side out and press.  Then edge stitch around the outer edge and baste the opening closed.


Take your collar and and pin it to your shirt, matching the center backs and lining the fronts up with the center fronts of your shirt.  Stitch.  Clip your curves and trim some of the seam allowance off. 


Take your button bands and fold them in half with right sides together.  Stitch along the top edges, making sure to enclose the corners of your collar in the stitching.  This is a difficult step to explain, so maybe the picture will be more clear.


 Now, take your collar binding and place it on top of the collar (right sides together) with the long edge even with your neckline seam allowance.  Make sure your shirt is out of the way and sew it in place along the same line of stitches you used when applying your collar.  The ends of your binding should overlap your button bands in the front.


Fold under the seam allowance on the other side of your binding and fold it down, so it covers the neckline seam allowance on your shirt.  Pressing well will help here.  I also don't use pins much, but I do use them here.


Stitch close to the other edge of your binding, stopping just short of the seam where you sewed your button band to the front of your shirt.


The outside will look like this.


Good job!  We will finish up tomorrow with our button bands and hems.  You are almost there!

Tuesday, March 8, 2011

Sew-along Part 4

Hey there.  I'm so sorry for the late post tonight.  Let's just say that I've put together a lot of toys in my time, and the Barbie Princess Castle is one I won't likely be willing to repeat in this lifetime!  But that's a rant for another day. . .

Where were we?  Let's see, we've attached our frill and button bands to the fronts of our shirt/dress.  Tonight, let's tackle the sleeves.  First, we will sew a row (or two or three) of gathering stitches between the markings on both sleeve caps.  (sorry for the poor sideways picture!)


Gather your sleeve caps until the sleeves fit into the armholes of your shirt.  Pin and sew them in place.  (Finish your seams with a serger or zig-zag stitch on your sewing machine.)  Press the the seam allowances toward the body of the shirt.  I suggest using a pressing ham to help you shape this part of your shirt. 


Topstitch close to your seamline, but only on the yoke.  (It took me a second to catch this part of Otto's directions although rereading them now, they seem perfectly clear.)  Like this:


Okay, get ready--your shirt or dress is about to really start looking like a shirt or dress with this next step.  Sew up your side seams and under-arm seams (and finish the seam allowances).   Take a second here to make sure you line up the front and back under-arm seams.   Press.  (I don't know if I've said this with almost every step, but if I haven't, add it in your head!)

Now, let's apply our elastic to our sleeve hems.  Take the length of elastic specified by the pattern and cut it in half.  Sew each piece, so it forms a circle.


Now, the Ottobre instructions tell you to finish the edges of your sleeves with your preferred method (zig-zag, serge, etc.) and then baste the elastic into the openings, stretching as you baste.  Then, they say to fold the elastic to the inside with the hems forming a casing and stitch close to the inside edge of the elastic, stretching as you sew.  You can, of course, do it that way.  I chose to serge the elastic to the sleeve openings, stretching as I serged and then flip it to the inside and sew--it just saves a step or two.


Now, press your sleeves again and give the elastic a good steam to help it bounce back into shape after all that stretching.   The result: super-cute puffed sleeves!

Tomorrow, we'll put on our collar. . . don't worry, it isn't hard. 

In the meantime, check out Stacy's finished dress!  She made a few modifications, and it turned out so adorable that I may have to make yet another of these dresses for summer.  http://thelandofka.com/?p=6959

Monday, March 7, 2011

Sew-along Part 3

Let's get started on our frills.  Take both of your frills and finish the outside, curved edge with a rolled hem.  I did a rolled hem using my serger, which looks like this:

However, you could also do a rolled hem using your sewing machine.  There's an excellent tutorial here for how to use your sewing machine and rolled hem foot to accomplish the same thing.  You should definitely check it out.  http://sewingmel.com/wordpress/index.php/2011/03/rolled-hems-on-a-sewing-machine/ 
While you are there, I recommend exploring the rest of her work too as she is extremely talented!  Thanks, Mel :)

After finishing the curved edge, sew some gathering stitches on the long, straight edge.  Pull up the gathering stitches until the bottom of your frill is even with the mark on your front pattern piece and the top is even with the neckline of the shirt. 


Baste both frills in place.


Okay, now, take your button bands and sew the interfaced edge to the opening edges of your fronts, right sides together with the frills sandwiched between the shirt fronts and the button bands.


Flip your button band out and press.


Looking good, right?!  I'm afraid that is all for tonight--Allie's birthday is tomorrow, and we have a cookie cake to decorate! 


Sunday, March 6, 2011

Let's Start Putting it Together. . .

Before we really get started putting this together, please make sure you've transferred the markings from your pattern onto your fabric.  The short lines you see along the edges of the pattern markings in Otto are equivalent to the notches you might see on a pattern from another company.  I make small snips in the seam allowance rather than using a pen or chalk, but use whatever method you prefer.

Sew gathering stitches between the markings at the shoulders of both front sections and along the top of the back section.  To do this, lengthen your stitch length on your machine as long as it will go and sew leaving long tails at either end of your stitches.  (You can also loosen your needle thread tension if you like, but I don't find it necessary on my machine.)  I almost always sew 3 rows of gathering stitches--one inside the seam allowance, one on the seam line, and one just a bit on the other side of the seam line, which will definitely have to be removed but which helps ensure even gathers.


Pull on your bobbin threads (all at the same time) to gather your fronts to fit the front part of the yoke, and the back to fit the back part of the yoke.


After gathering the pieces to fit, stitch the back to the back part of the yoke, and the fronts to the front shoulder sections of the yoke (being careful to make sure the center fronts are to the center).   Finish the seam allowance with a serger or zig-zag stitch on your sewing machine, and press the seam allowances toward the yoke.  Topstitch close the seam-line.


When you have both fronts and back section attached, it will look like this.


It isn't much, but that is all for today.  Tomorrow, we'll handle the frills (which you can skip, by the way, if you prefer the shirt/dress without them) and attach the button bands and probably the sleeves.

If you have a serger and have never used it to make a rolled hem, get out your manual and read up on how to do it.  If you don't have a serger, a sewing friend is going to put up a tutorial on her blog for how to do this on your sewing machine.

How is your shirt or dress coming along?!


Saturday, March 5, 2011

Ready Freddy? Let's Get Started!

I think we should just jump right in and get started on our shirts or shirt-dresses.  I'm going to break it up into small bites of work, so that anyone who may be like me and has way too much other stuff going on, can fit it into their regular days!

First, I'd love to know who all is sewing with me, so if you are, leave me a comment. . .okay, I really like getting comments too. . .tell me whether you are sewing a shirt or dress, and what size you are making!

Today, we'll trace the pattern and cut out and prepare our fabric pieces. 

If your Otto is new, pull the pattern sheets from the center of the magazine and locate pattern sheet B.  Spread it out on a flat surface and get your tracing paper (I use pattern-ease) and pen or pencil.  The shirt is design #15, so turn to page 31 in your Otto magazine and keep it handy.  **If this is your first time making and tracing an Otto pattern, please don't panic or give up--I know it looks intimidating.**

Trace the pattern pieces that are printed in black--there are 8 pattern pieces for this shirt.  If you look at the bottom of the pattern sheet and locate the number printed in black for the pattern piece, you can trace a line up the sheet and find the place where the pattern piece is printed.  There are also small scale pictures of the pattern pieces in the magazine--I find it helpful to refer to the small pictures when tracing because it is less confusing that way. 

I trace my Otto pattern pieces as printed and add seam allowance when cutting.  After tracing the pattern pieces, cut them out.  Get your fabric ready.  You can cut out the shoulder yoke (2), sleeves (4), collar (5), frill (7), and collar binding (8) exactly as they are.  Add 3/8-inch seam allowance to every piece except for the frill and collar binding--I just estimate it as I cut, but I do use my hem gauge to give myself a visual. 

If you are making the shirt, go ahead and cut out your front (1), back (3) and button band (6) pieces as well.  If you are making a dress, you will modify them as follows:

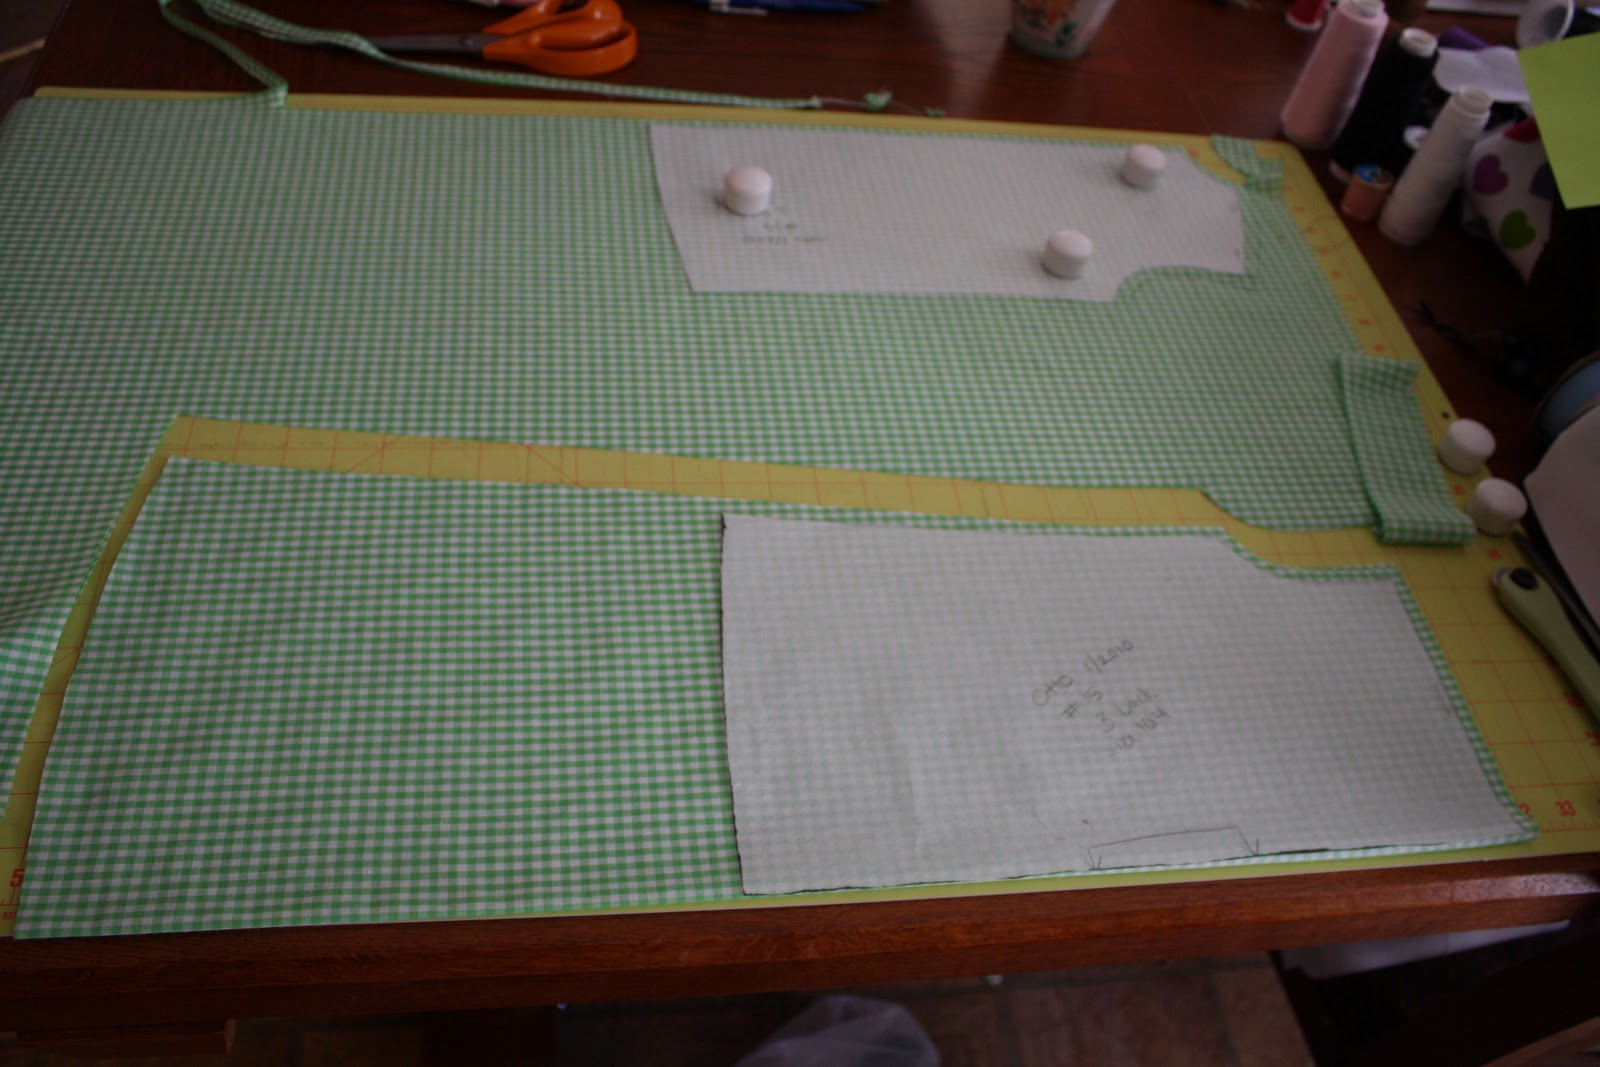
Back and Front:  The pattern piece for your dress back is cut on the fold.  Because there is some fullness built into this pattern with gathers where the front and back attach to the yoke, I don't flare it out much for the dress--just extend the line of the side seam down until it is the length you want your dress to be.  (I added some extra length, so I can determine the length at the end after trying it on.)


For the front, you will want the side seam and length to match the back, so cut the front piece out around the shoulder and down through the bottom of the armhole.  Then, lay the back piece on top of it with the bottom of the armholes matching and cut the side seam, using the back as your pattern. 

Button Band:  You will add length to your button band, so it is as long as the center front of your front pattern piece.  (You can see here that I cut mine slightly longer.  You will be able to even everything out before you hem it!)

Okay, all cut out!  Now, let's apply the interfacing.  You need to interface one of your collar pieces and half of each button band.  The parts that should be interfaced are shaded in gray on the small pictures of the pattern pieces on page 31 of your Otto magazine.  I used light-weight fusible interfacing.

Collar:  Fuse interfacing to the wrong side of one collar piece. 


Button Bands:  Fuse interfacing to the wrong side of both button bands as pictured.


Whew!  That's a lot!  Take it at your own pace.  Tomorrow, we will start putting it all together, which is the best part.  If you have any questions, let me know!

Thursday, March 3, 2011

Preparing for Saturday. . .

I just have time for a quick drive-by post today, so here is your reminder of the day:  Make sure you've prewashed the fabric you will use for this weekend's sew-along.  I know the last thing I want to do when I'm ready to start a project is take the time to wash and dry the fabric I want to use, so do it now.

Oh, and in case you are tempted to skip this step, don't!  Always, always, always prewash your fabrics.  I wash most fabrics in hot and dry on hot prior to use.  That way, I know I will be safe since I wash most of our clothes on cold after they are made.  Go ahead and go do it, so you'll be ready to go!