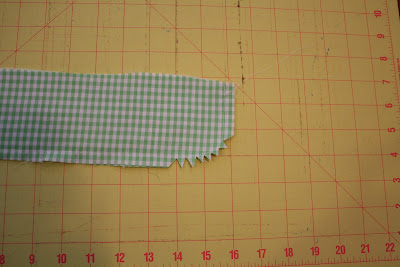
First, take your two collar pieces (one interfaced, the other not) and stitch the outer edges together. Leave the edge that attaches to the shirt open. Notch the curved "corners" and it doesn't hurt to clip every inch or so into the seam allowance on the straight edge between them. (It isn't actually straight--it has a slight curve--so the clips will help it lay better when you turn it.)
Turn your collar right side out and press. Then edge stitch around the outer edge and baste the opening closed.
Take your collar and and pin it to your shirt, matching the center backs and lining the fronts up with the center fronts of your shirt. Stitch. Clip your curves and trim some of the seam allowance off.
Take your button bands and fold them in half with right sides together. Stitch along the top edges, making sure to enclose the corners of your collar in the stitching. This is a difficult step to explain, so maybe the picture will be more clear.
Now, take your collar binding and place it on top of the collar (right sides together) with the long edge even with your neckline seam allowance. Make sure your shirt is out of the way and sew it in place along the same line of stitches you used when applying your collar. The ends of your binding should overlap your button bands in the front.
Fold under the seam allowance on the other side of your binding and fold it down, so it covers the neckline seam allowance on your shirt. Pressing well will help here. I also don't use pins much, but I do use them here.
Stitch close to the other edge of your binding, stopping just short of the seam where you sewed your button band to the front of your shirt.
The outside will look like this.
Good job! We will finish up tomorrow with our button bands and hems. You are almost there!


Looks very nice! I have made a bunch of short sleeved shirts for my son which use an Ottobre pattern, too. I have done the collar that way with those shirts. I finished up my other dress last night and made a collar stand for it. Of course the first one was too short...bring on the seam ripper LOL! I want to make a little jacket to go with it, so hopefully I can get it posted soonish once that is done, too.
ReplyDeleteI'm finishing this step up today and might go ahead and finish the shirts. It just depends how long my little one naps today!
ReplyDelete