Saturday, August 6, 2011

Mama-Made, Kid-Approved

Allie, Jenna, and I took a trip to the fabric store yesterday, so that Allie could pick out fabric for her desk bag. . .take 2.  (Yes, I'm teaching them to pet all the pretty fabrics. . .lol!)  We walked around and Allie filled up the buggy with bolt after bolt of fabric that she liked.  She had peace signs, polka dots, and tye dye prints, and then we compared them two at a time until she had narrowed her options to just one. 

After a trip to the utility fabric section (for duck cloth) and the trim section, we headed to the cutting table.  Here's the result. . .she likes it!
  

I picked up some extra duck cloth while we were there as I had in mind some chair bags for the kitchen.  These will hold homework supplies to keep them off the counter and hopefully end the constant hunt for a pencil.


The color palette is a bit more subdued  in order to fit better in the kitchen.  I divided the bottom pocket into two pockets and some slots for pencils.


Since I knew the dimensions of my chair, I skipped the elasticized flap and opted instead for a longer flap with a more fitted bag.  


I'm happy with how they turned out and think they will be great to have when school starts later this month.

Have you entered the giveaway yet for the desk bag?  If not, don't forget to go here and leave a comment.  I'm choosing a winner tomorrow night!

Wednesday, August 3, 2011

Do you need a desk bag?

Allie's back to school supply list this year (and last) includes a desk bag that hangs on the back of the desk.  I did what any good crafter would do and started searching the web for a pattern or tutorial to make one, and I was shocked when I couldn't find one!  When Sew, Mama, Sew! put out a call for tutorials, I knew I wanted to participate. 

If you need to make a desk bag, head on over there for the tutorial.  If you don't want to make one though, I have exciting news!  Unfortunately, Allie doesn't like this bag, so I'm going to give it away to one of you.  Leave a comment here and be sure to include your email address, and I'll choose a random winner on Sunday.

Sunday, July 31, 2011

Weekend's Sewing

I finished Allie's shirt this weekend using the Miss Mary pattern without the gathered skirt.  This is a size 7 (view B) modelled on Allie's body double that is about a size 5/6.  It will be perfect for back to school, which is coming fast.


I also made two board-mounted valances out of burlap for a friend's office.  They turned out cute, but I need a bath now!  Burlap sheds.  Bad.  They are lined with muslin.


The fringe needs to be straightened, but it is cute.  They also have decorative piping around the top.


Sunday, July 24, 2011

Miss Mary in Seersucker

I've been trying to decide what to do with this seersucker since I picked it up at Joann's, but I knew I wanted to make a fairly simple dress for Jenna.  (Allie has requested a shirt.)  Someone suggested the Miss Mary by the Handmade Dress, and since I've been eyeing the pattern for awhile now, I bought the e-pattern and went to work.  I bought the larger size range (sizes 5-12) and made view A for Jenna in a size 5.


The pattern information says that it can easily be dressed up with piping or bias trim, but be aware that the instructions don't contain information for doing either.  The pattern finishes the neckline and armholes by lining the bodice, but I decided that I did want the look of bias tape, so I skipped the lining completely and made some bias tape out of the same brown broadcloth that I used for the sash.


Even though the wrap and cut-on sleeves are trendy and reminiscent of a kimono, the silhouette is classic little girl.

Every little girl in the south needs a dress made out of seersucker.  It is the perfect fabric for playing in the heat and humidity.


I think I will use View B of the same pattern to make Allie's shirt.

Saturday, July 23, 2011

In case you've noticed I've been gone. . .

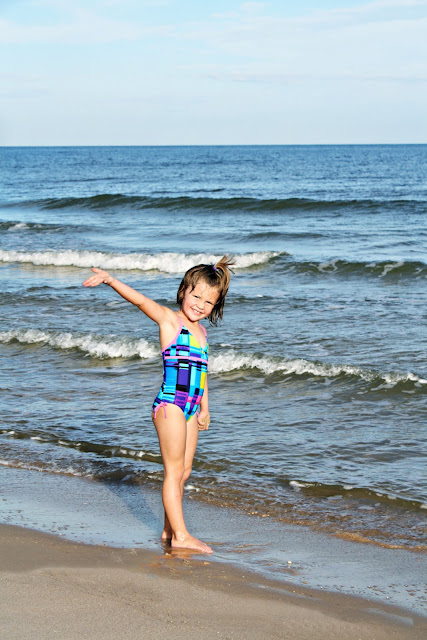
I haven't abandoned you guys!  We spent last week playing in the sand and water at St. George Island in Florida.  It is a gorgeous, uncrowded beach without any high rise condomineums or the like to mar the view. 

We had a great time. 


I haven't gotten back to my machines yet, but I did work on a tutorial before I left that I'll be able to share someday soon.  I'm trying to decide what my next project will be, but I think it will involve seersucker!

Sunday, July 10, 2011

They needed sun hats too, right?!

Soon after modelling my hat for me, both girls decided they needed a sunhat too. . .afterall, we are going to the beach.  (The keep reminding me.)  I let them both go shopping in my stash for their coordinating fabric. 

Allie chose the green and black floral she had picked for her Laguna and specified that she wanted black binding like my hat. 


 The only alteration I made to the original pattern was to fold out some of the height in the crown of the hat and remove about an inch from the outside of the brim.  I also made the band about an inch narrower.  I left the circumference of the hat the same, which worked fine.  For our family, the one size fits all hat is kid-sized!


Jenna chose a super-cute sea animal print that I bought as a remnant several years ago. 


I didn't have any matching bias binding, so I made hers to match.  I also couldn't find my bias maker thingamajig, so I made it the old fashioned way. . .luckily, it didn't take too much.


This free pattern has been 100% worth it!  Ha ha.  I highly recommend it.

Monday, July 4, 2011

Hat!

Our vacation is fast approaching, and I decided that I want a sun hat to wear on the beach.  I wanted to make it out of black canvas with a turquoise sash and lining, but I couldn't find any black canvas at Joann's today.  Since I'm not a patient person, I settled on this natural-colored duck cloth. . . and I'm very happy with the choice now.  I love the way it looks with the black binding. 

The girls are modelling for me as I'm much more comfortable behind the camera than in front of it.

I used the free Hot Patterns Sunny Side Up Sunhat pattern, which can be found here. 


The pattern is listed as one size fits all, but I have a really BIG head.  I got it put together minus the binding and sash and tried it on, quickly realizing that 23 inches is outside of the limits of one size fits all.  I altered the hat by cutting the u-shaped portion in the back up a bit higher to allow more room for my noggin.

We measured our heads for comparison, and Allie's head is already 21 inches around, which coincidentally, is the exact same size of her daddy's head.


The pattern goes together easily, but the instructions are somewhat lacking, and the notches don't line up quite like they should.  Instead of relying on the notches, I just made sure that the center fronts matched up and went from there.  And it's free. . .how can it get better than that?!


I'm looking forward to wearing it on the beach!